¶ Overview
The locate module in the fleet app presents a user with a map view containing markers representing vehicles / assets.
The following is an overview of the layout and controls:
- Vehicle asset list pane - HINT: note the blue highlighted icon, click on this arrow to hide this pane
- Shortcut icon tray
- Map layer selection tray
- Map navigational controls
- Additional map layer controls
- Multi filter selection pane - HINT: note the blue highlighted icon, click on this arrow to hide this pane
- Overall vehicle / asset communication status
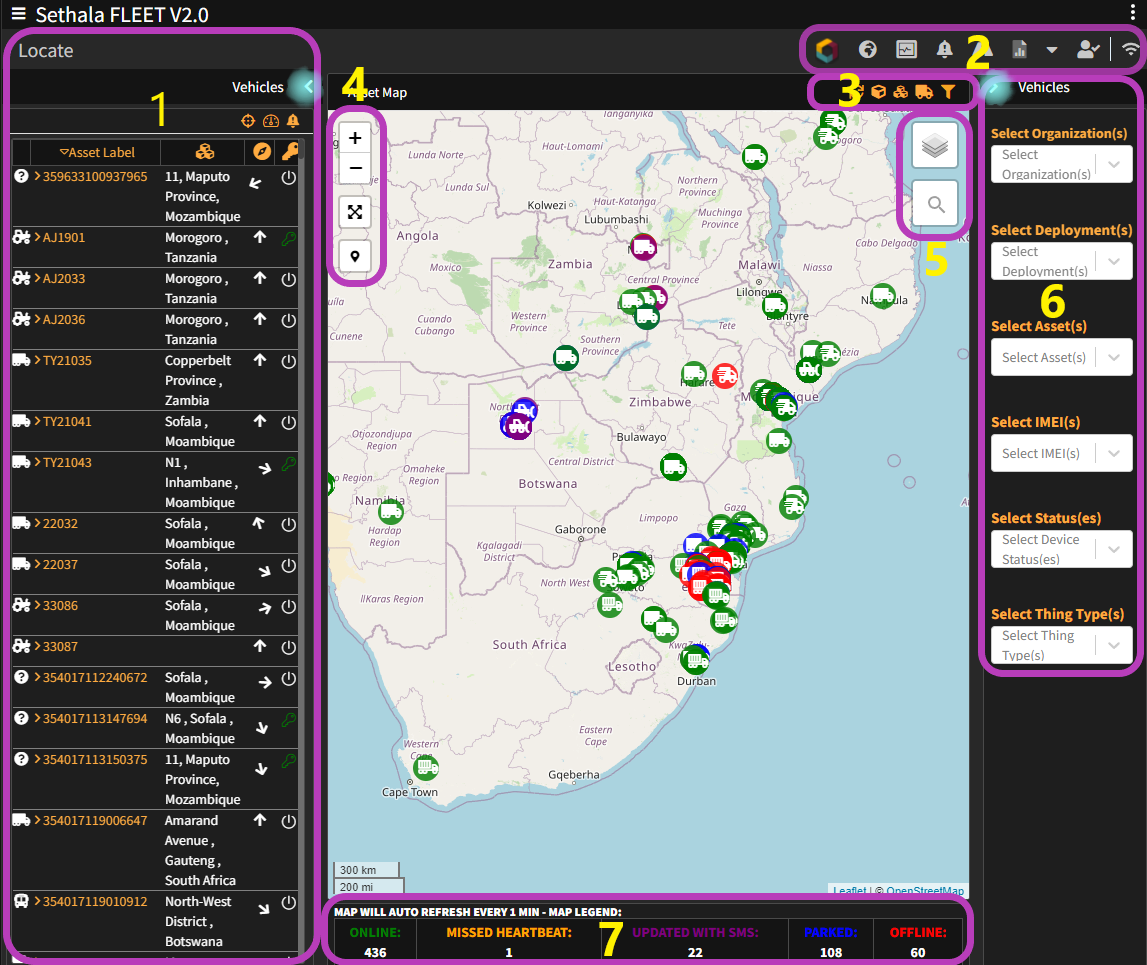
Locate Map
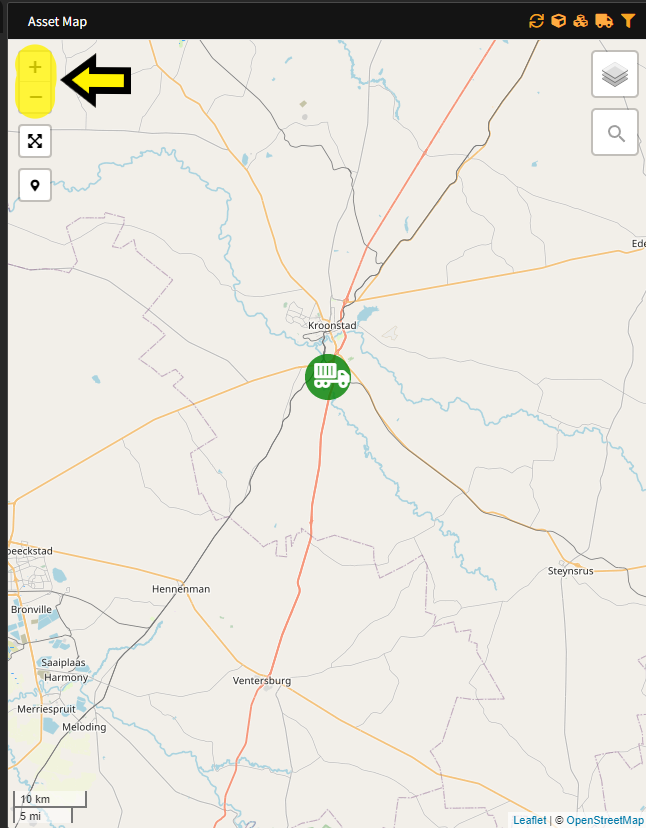
One can zoom in and out on the map by either using the scroll wheel on your mouse or by using the zoom in (+) and zoom out (-) icon displayed in the top left hand corner of the map.
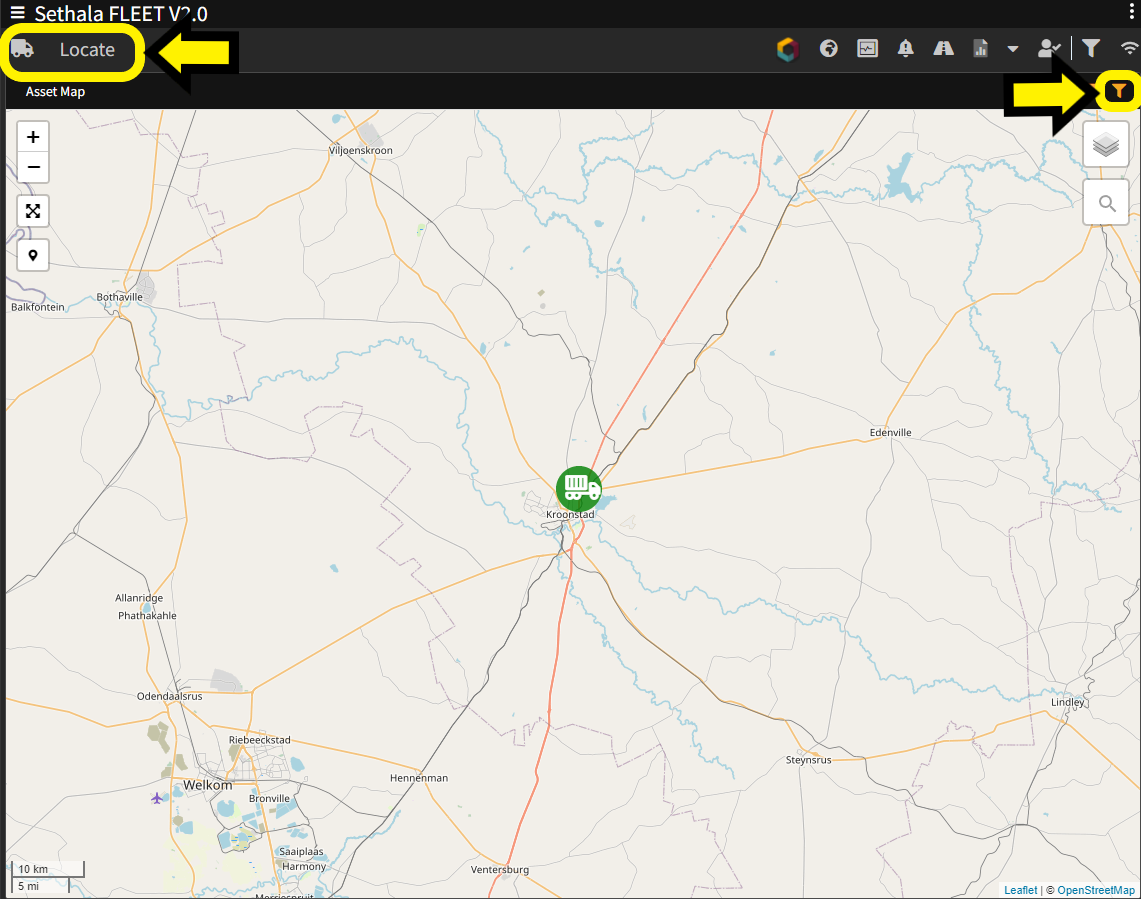
As illustrated in the main overview picture, one can hide the vehicle asset list and the filter pane. Once hidden, you will have more real estate on your display to view the map. Should you wish to show the panes again, one can do so by clicking on the icons as per below
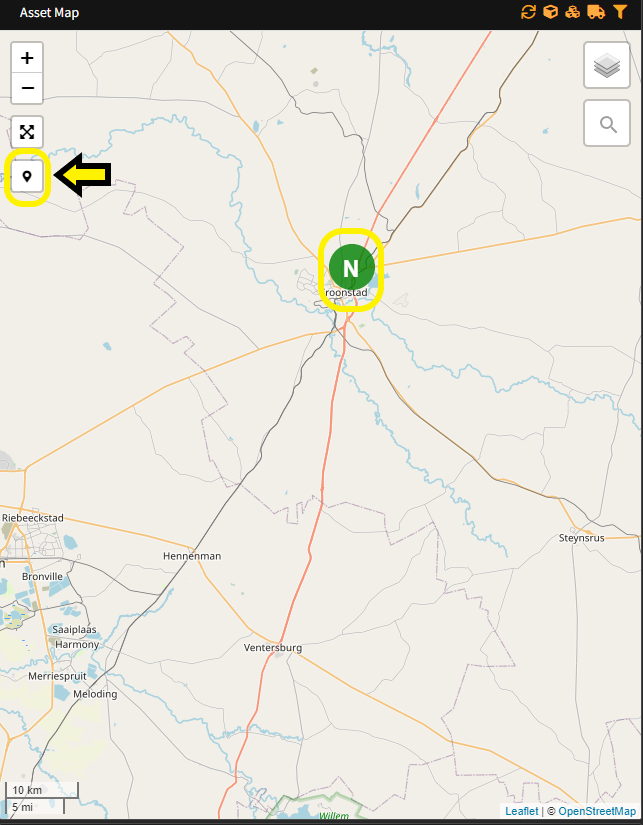
One can switch the icon representation between the type of vehicle and the last calculated direction in which the vehicle / asset is/was travelling by clicking on the icon highlighted.
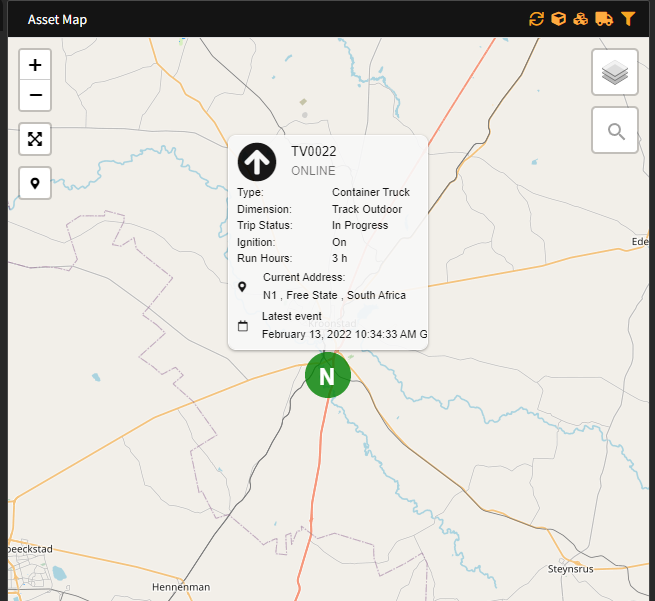
Moving your mouse pointer onto any vehicle / asset displayed on the map will pop up a quick summary of the vehicle / asset.
Click on any vehicle / asset displayed on the map in order to bring up a tooltip with more detail and options pertaining to that vehicle / asset.
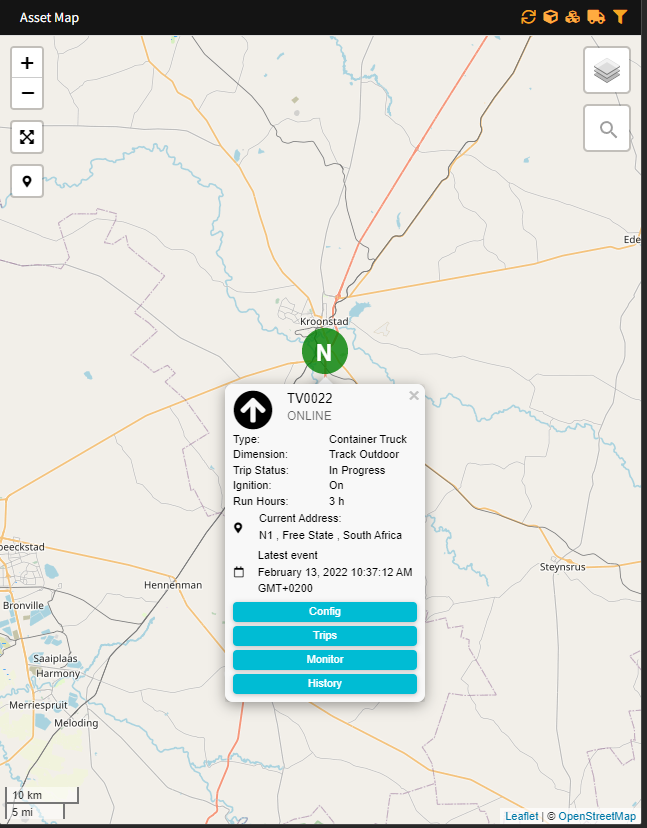
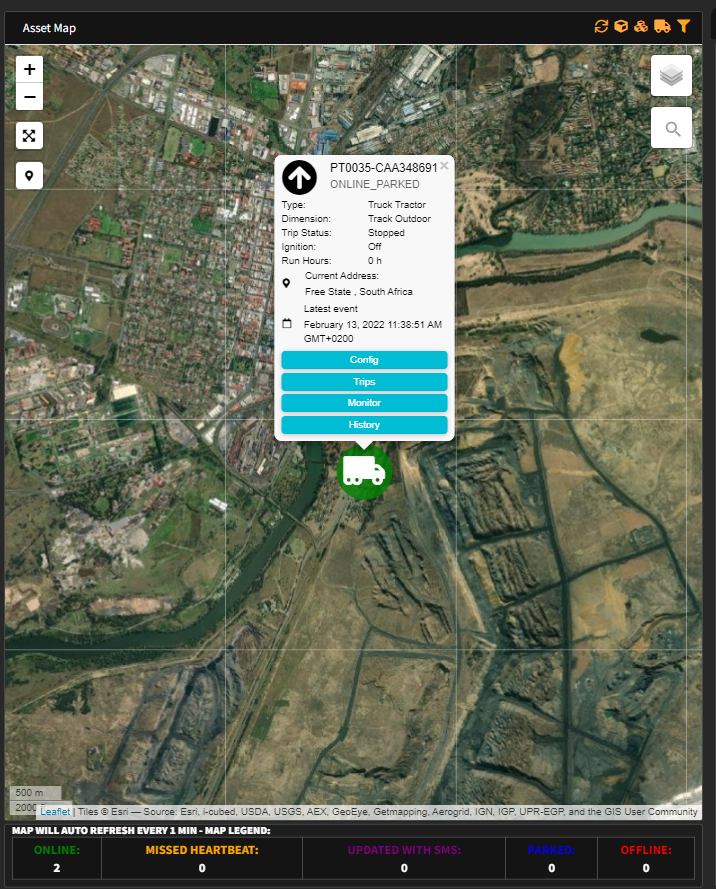
The example below indicates that the vehicle / asset was last reported travelling in a northern direction, this is indicated by the black and white arrow pointing up on the vehicle / asset summary as well as the more detailed tooltip.
¶ Map Layers
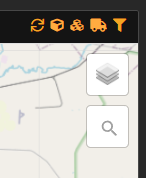
Multiple layers exists and can easily be toggled to display or hide. This can be found from the Map Layer Selection icons:
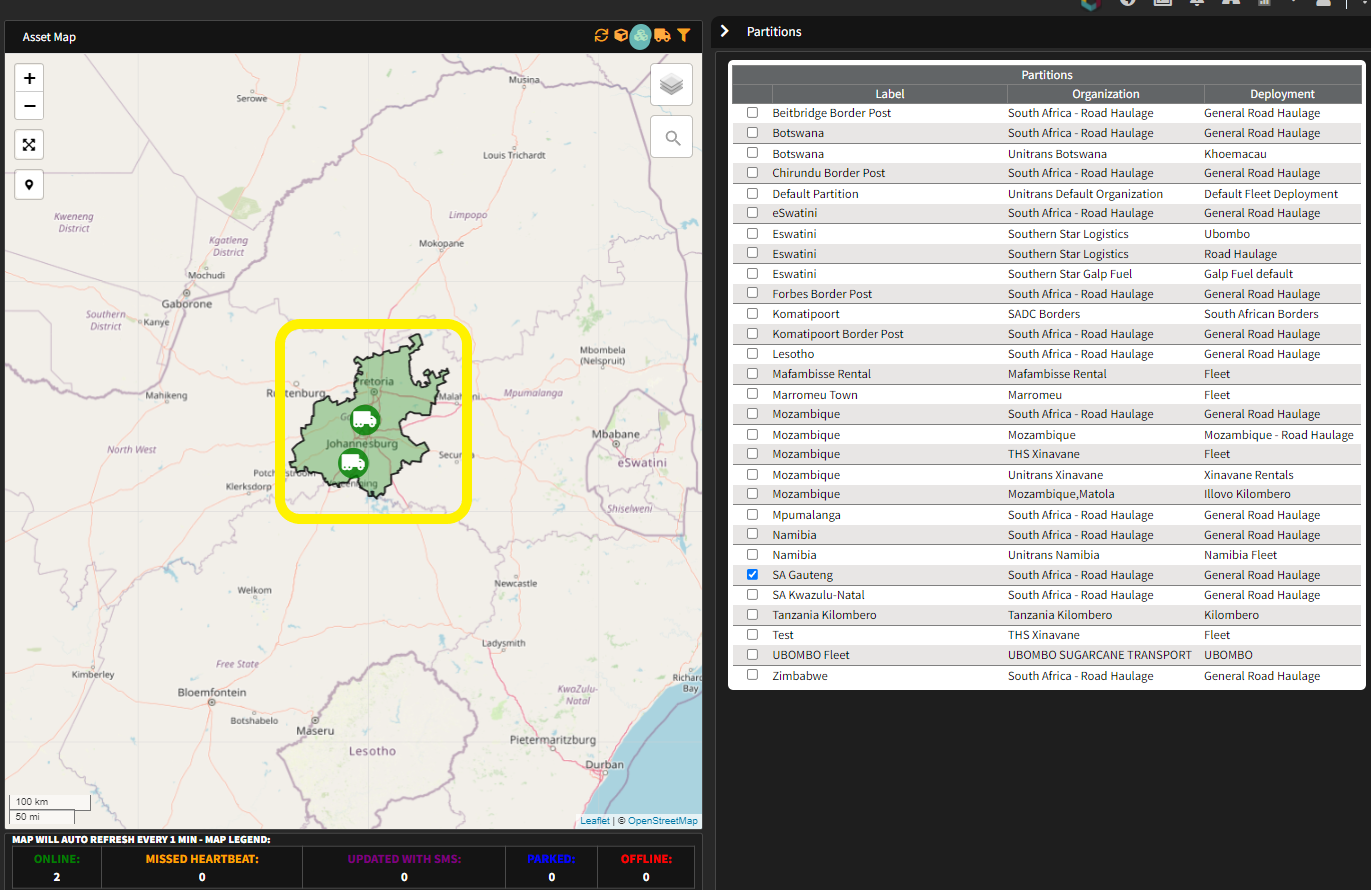
Partitions can be displayed on the map by clicking the icon (highlighted in blue) and selecting the required partition. In the example below, the partition for Gauteng has been selected.
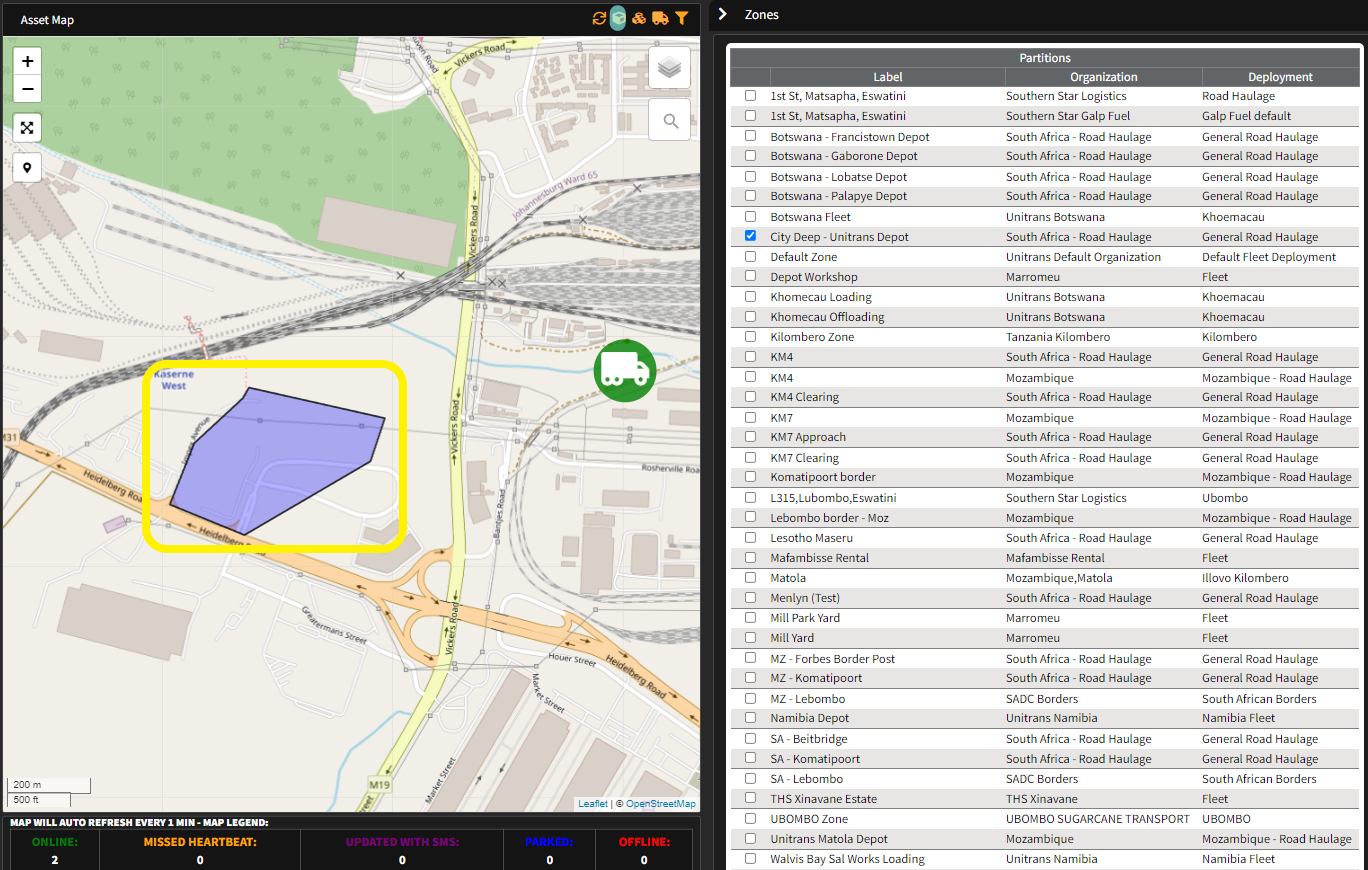
Zones can be displayed on the map by clicking the icon (highlighted in blue) and selecting the required zone. In the example below, the City Deep zone has been selected.
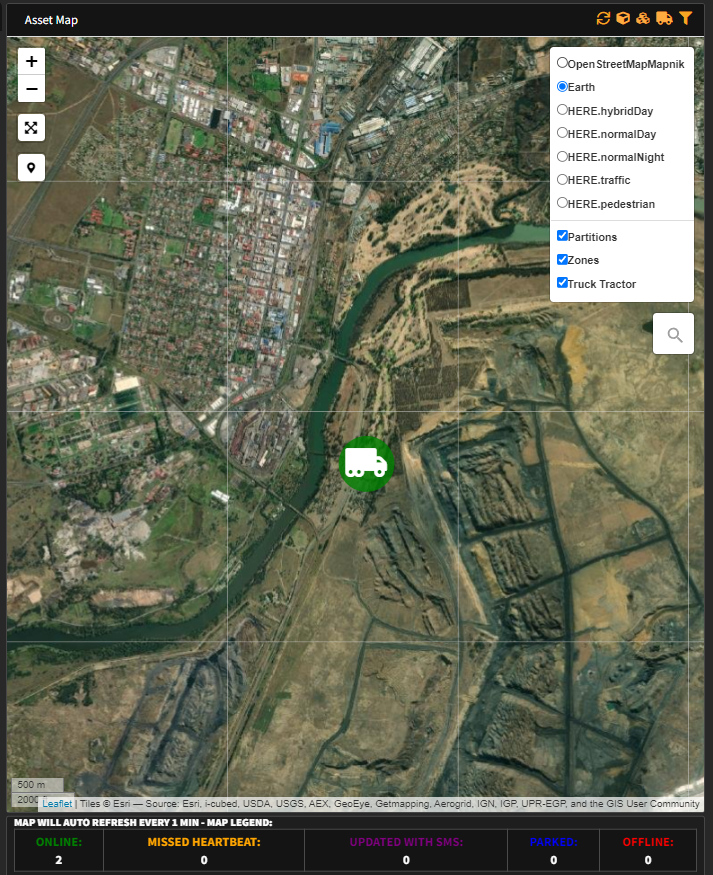
One can quickly disable/enable an entire layer by clicking on the layer icon and selecting / deselecting the layer as per your requirement. One can also switch between the different map sources provided, in the below example, the Earth map is selected, all the layers are enabled.
¶ Asset Filter
By enabling one or more filters, you can customize the entire display of the Locate function
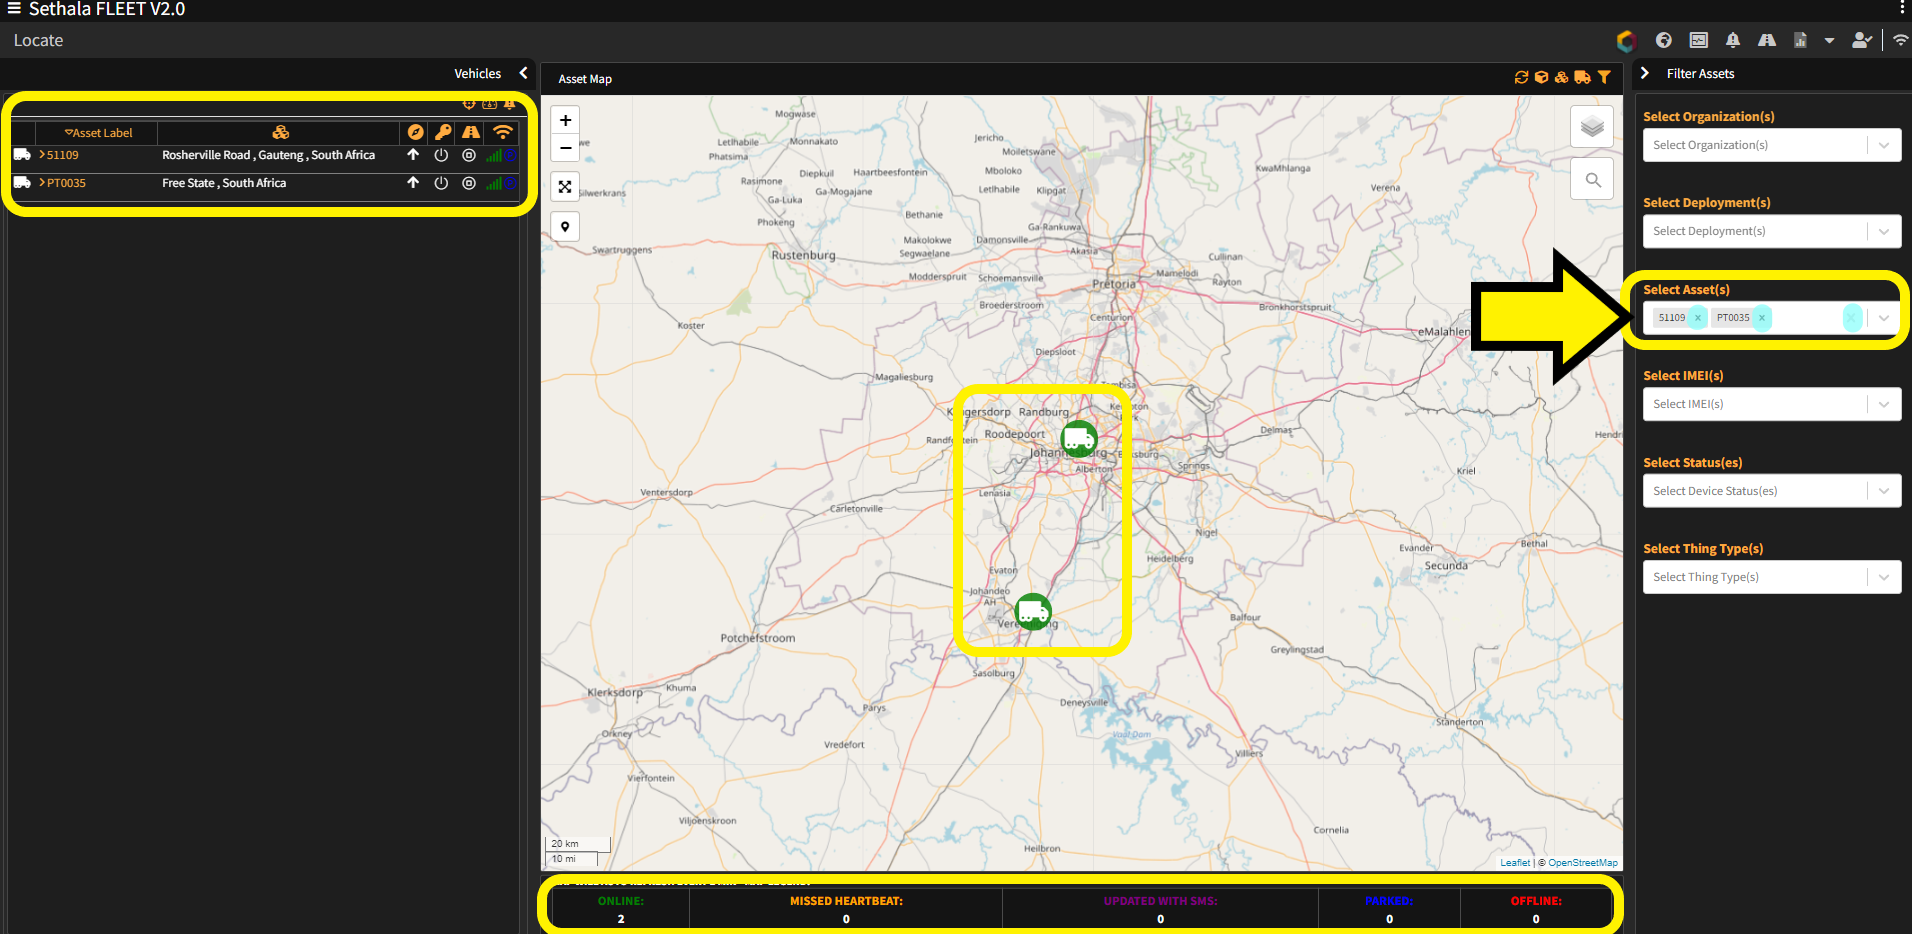
Each filter box works exactly the same, click in the filter box required , a list will pop up where you can either choose what you want selected, or start typing to even further filter the list. Click on any item in the list to apply that item as a filter. Multiple items can be selected for your filter. In below example, 2 vehicles / assets has been selected.
When a filter is applied, all panes from the Locate function will display data according to your filter selection, eg the map, asset list and status metrics below only shows 2 vehicles / assets.
You can clear your selection at any time by unselecting one or all items in the relevant filter box, see highlighted in light-blue below, the X icon on the far right will clear all for that filter type.
¶ Vehicle / Asset List
Vehicles / asset entries in the Vehicle / Asset list can be expanded by clicking on the vehicle identification / name as indicated in light-blue below. Once expanded you will be presented with more detail pertaining to the vehicle asset selected.
Detail include last location reported, direction, whether the vehicle is on or not, speed and many more.
Vehicle / asset register detail eg VIN , registration and make will be displayed if captured by a user with administration rights.
Part of the expansion provides one with shortcut icons to other valuable functions of the Fleet function pertaining to the vehicle selected.
- Config - device configuration and parameters
- Trips - quick overview of trips completed and in progress
- Monitor - technical information
- History - more detailed overview of trips completed and in progress
- Raw data - used for troubleshooting
- Alerts - history of alerts raised (requires setup)
- Distance - calculate distance current location and one or more waypoints
- Schedule - configure notifications based on location
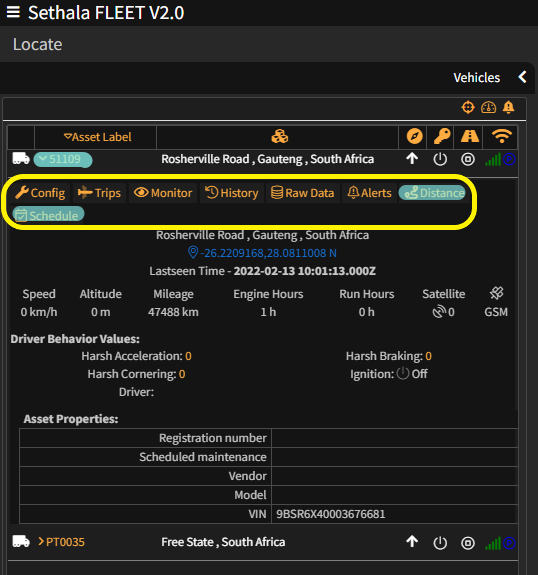
One can collapse the expansion of a vehicle / asset by clicking in the same place that expanded it.
¶ Distance Calculator
This function uses the selected vehicle / assets current or last reported location as a starting point. You can add one or more other locations to get duration and distance calculated.
Clicking on the Distance item will overlay a new window similar to the picture below.
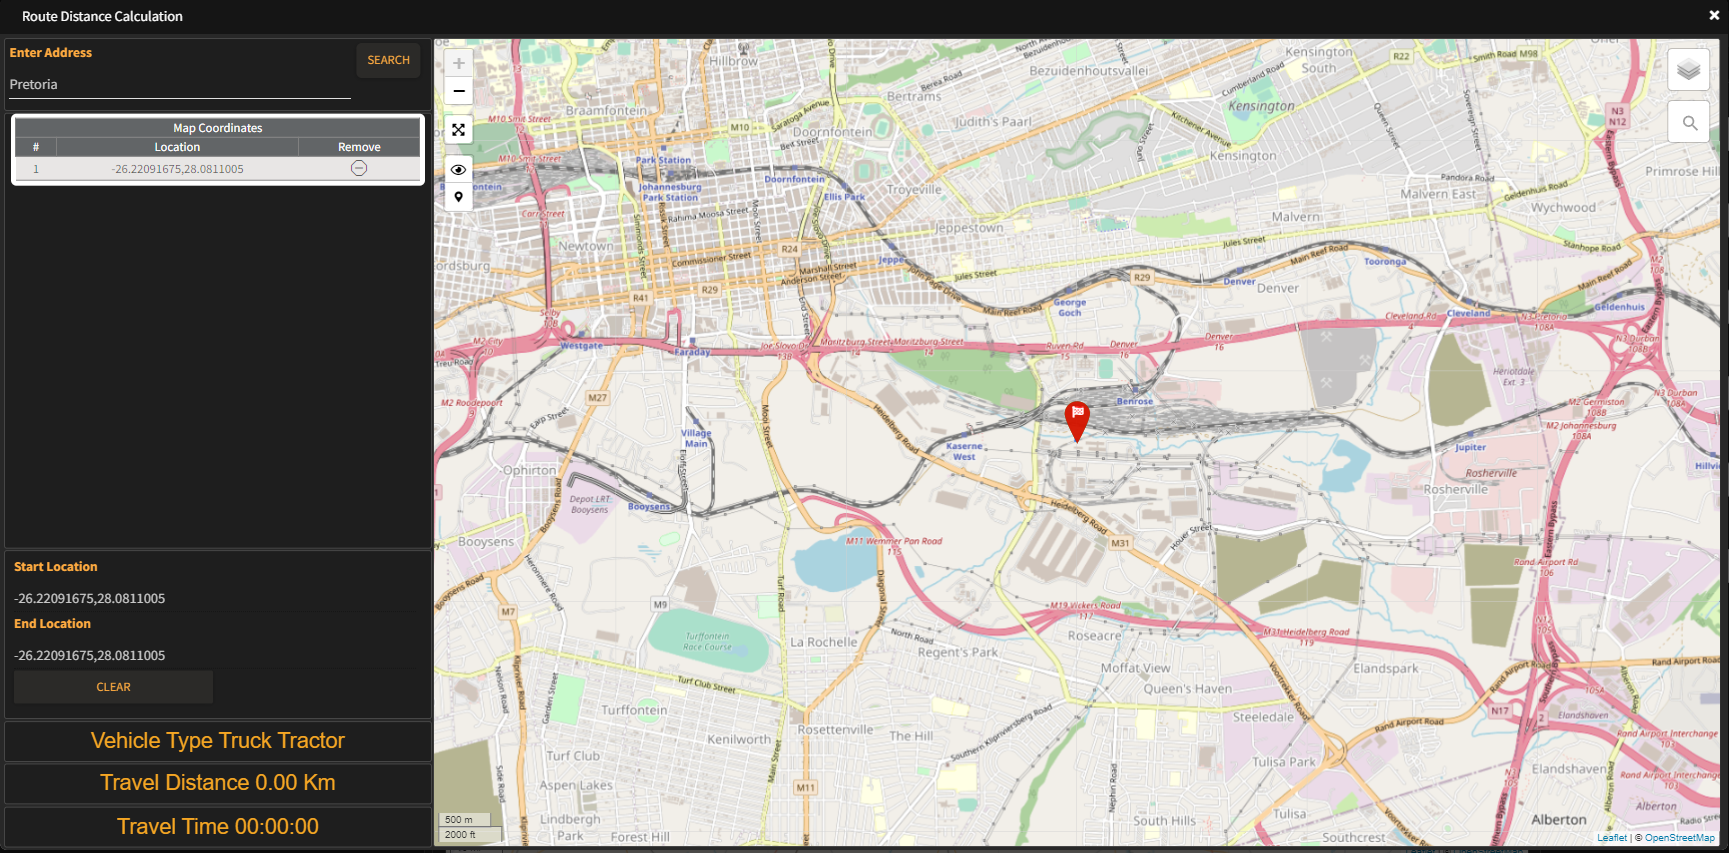
Enter a location in the Enter Address text field and click on SEARCH to search for an area or street address matching your entry. In this example, a search for Pretoria was made.
Multiple entries may or may not be returned.
Click on the icon in the View Location column to update the map on the right hand side to get a map view of the entry selected.
Once you have located the entry, click on the + icon in the Add column to add that specific location in your calculator.
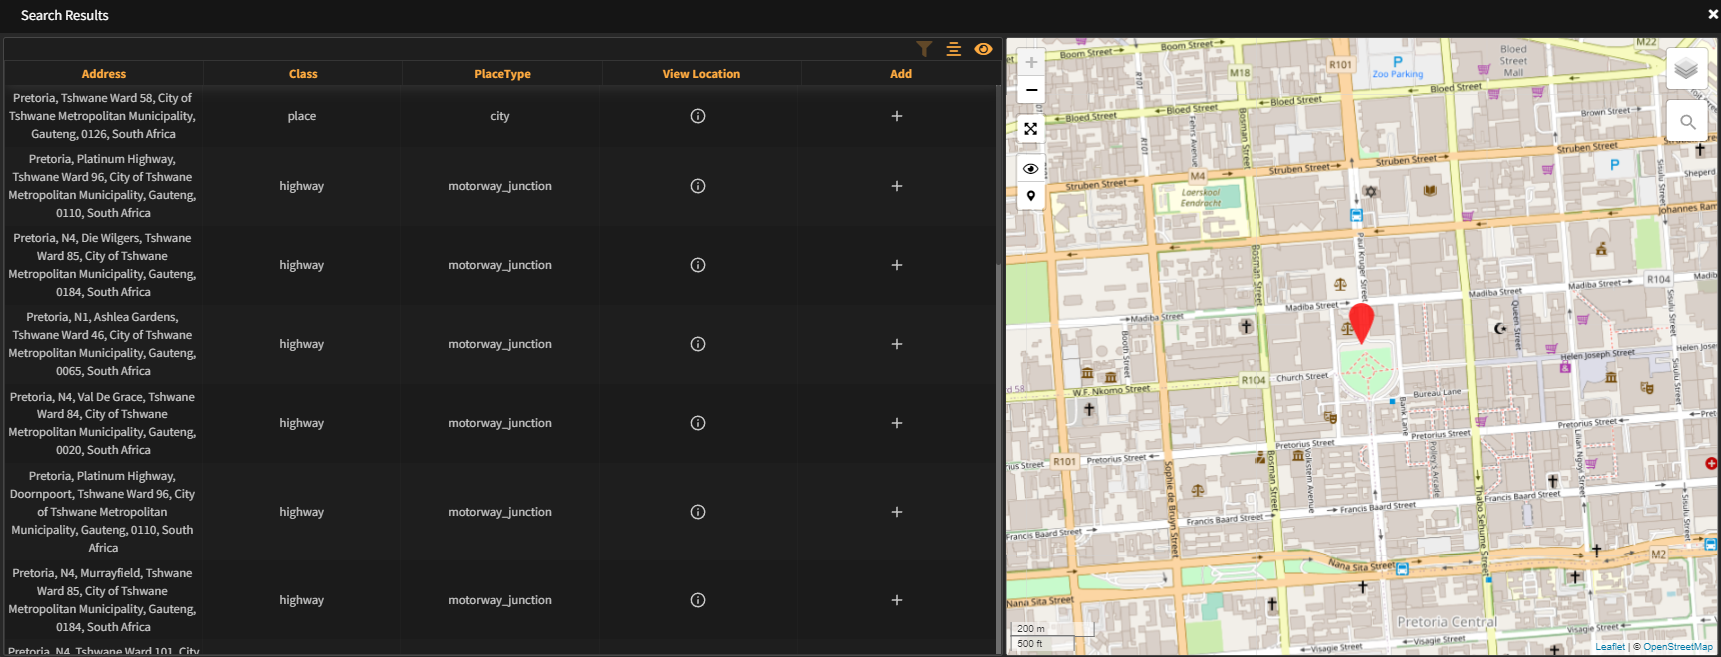
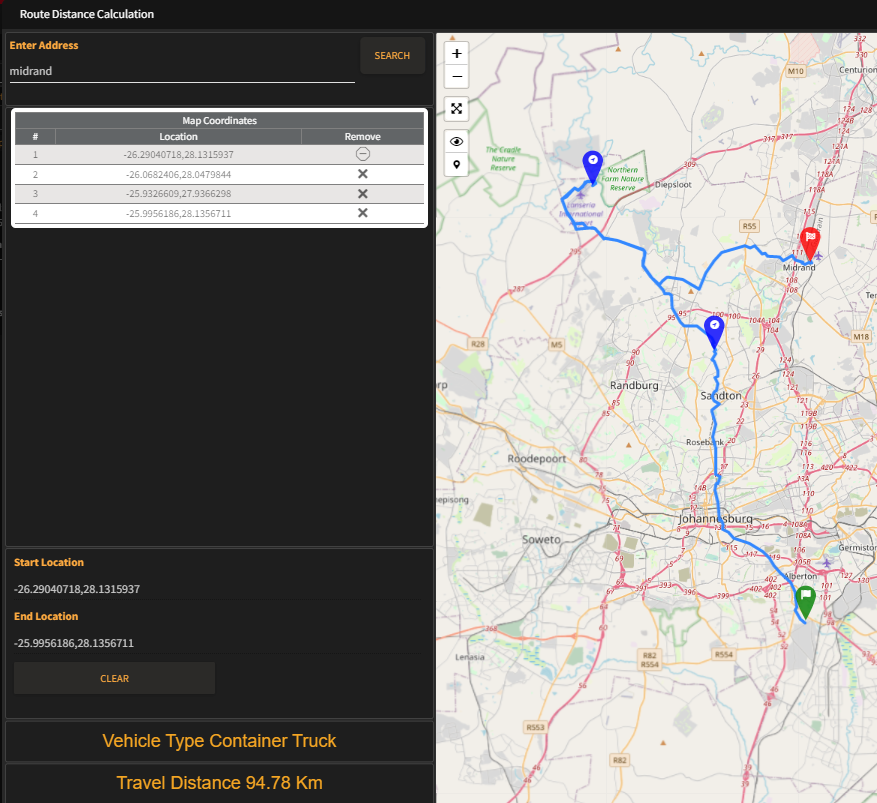
This process can be repeated to add multiple waypoints/destination into the calculator.
As per below, 3 destinations has been added to the calculator.
Should you wish to remove an entry in the calculator, you can click on the X icon associated with the entry you wish to remove, or simply click the CLEAR button to start over again.
¶ Scheduler
The Schedule is a new and exciting feature that has been added to assist in notifying one or more person via email of a vehicles location, approaching and arriving at a certain point of interest. For instance,
assisting key people of a vehicles current location as well as when arriving at (as per example below) Durban Port. This can greatly assist managers and other staff with planning.
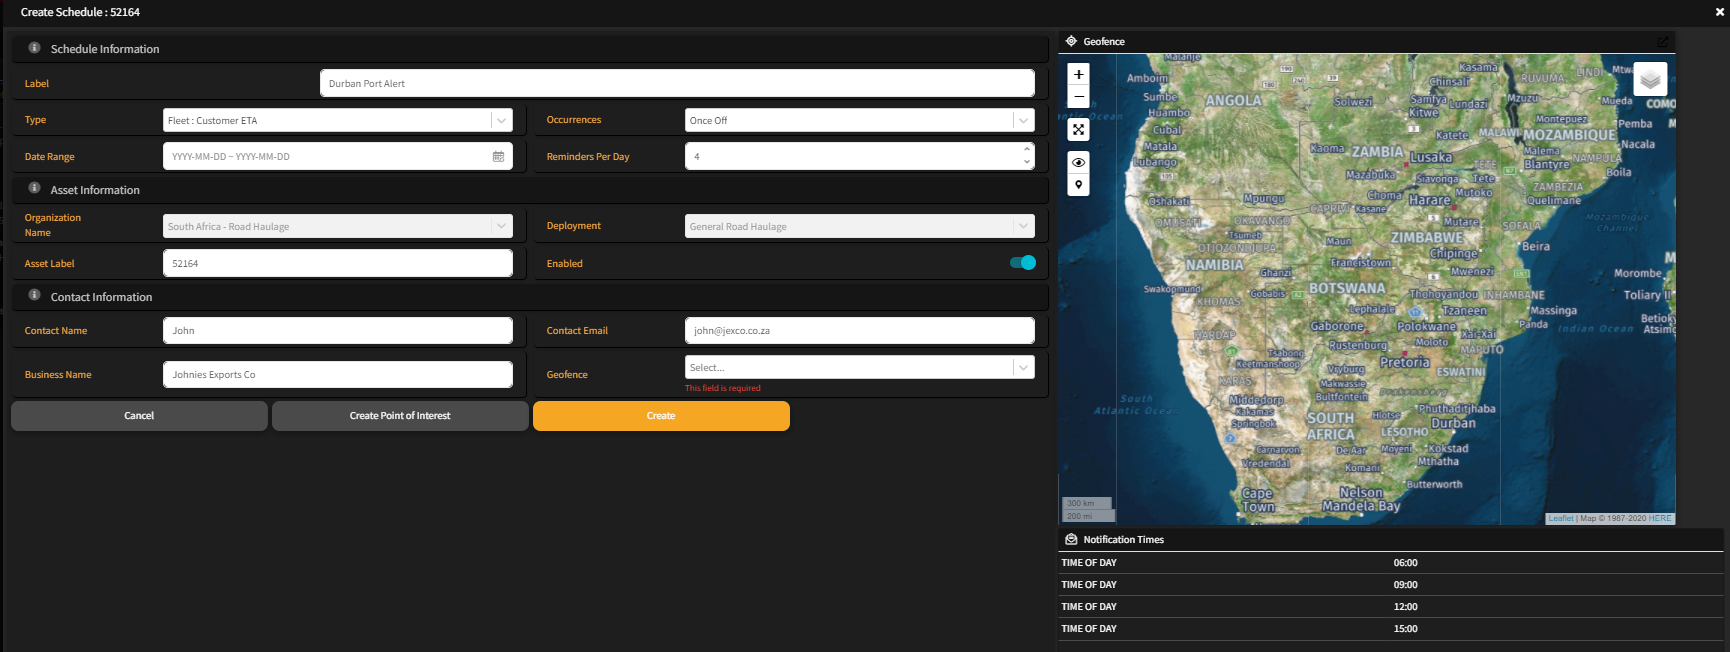
Clicking on the Schedule item will overlay a new window containing a table view of all Schedules linked to this vehicle. Click on the Add icon (+) in order to create a new schedule, a new window will overlay your display similar to the picture below.
Give this schedule a unique, easy to identify, label. Make additional changes eg occurrences, the name of the person you would like to be notified, his/her email address needs to be correct, always double check the spelling.
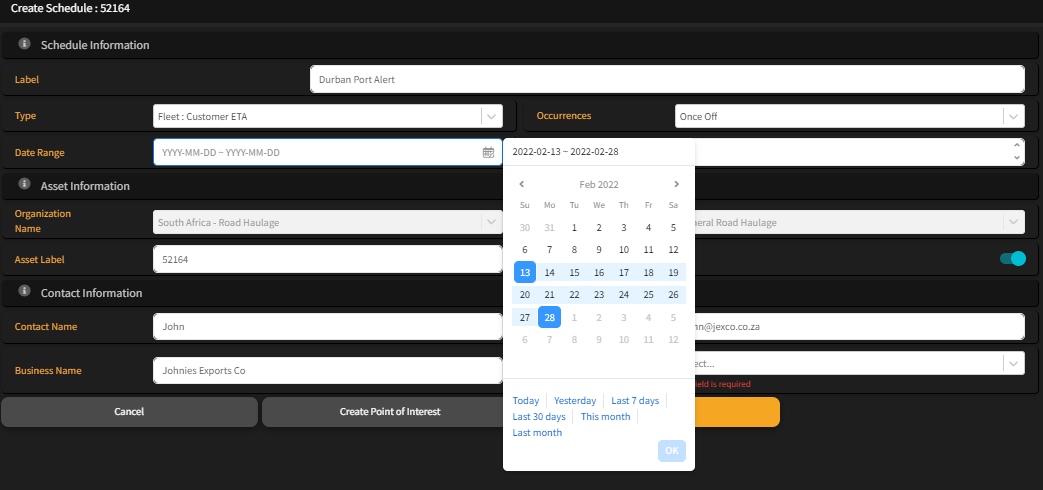
The Date Range selection box works by selecting a start and then an end date ( see highlighted in blue) that will apply to this schedule, for instance, if you have a contract for deliveries/collections that is only going to fall within the period of 13 - 28 February 2022, you would want to only trigger email notifications during this period.
One has to select a geofence for this Schedule rule to apply to. This geofence will be used in the calculations performed which will provide the information necessary by the notification created by this schedule.
If a geofence doesnt already exist in the list, you can create a new geofence by clicking on the button Create Point of Interest located on the Create Schedule Main Page.
Enter an address or existing point of interest into the Search text field and click on the SEARCH button.
Find the closest entry matching your search, click on the icon in the Select column in order to change the map to focus on that area.
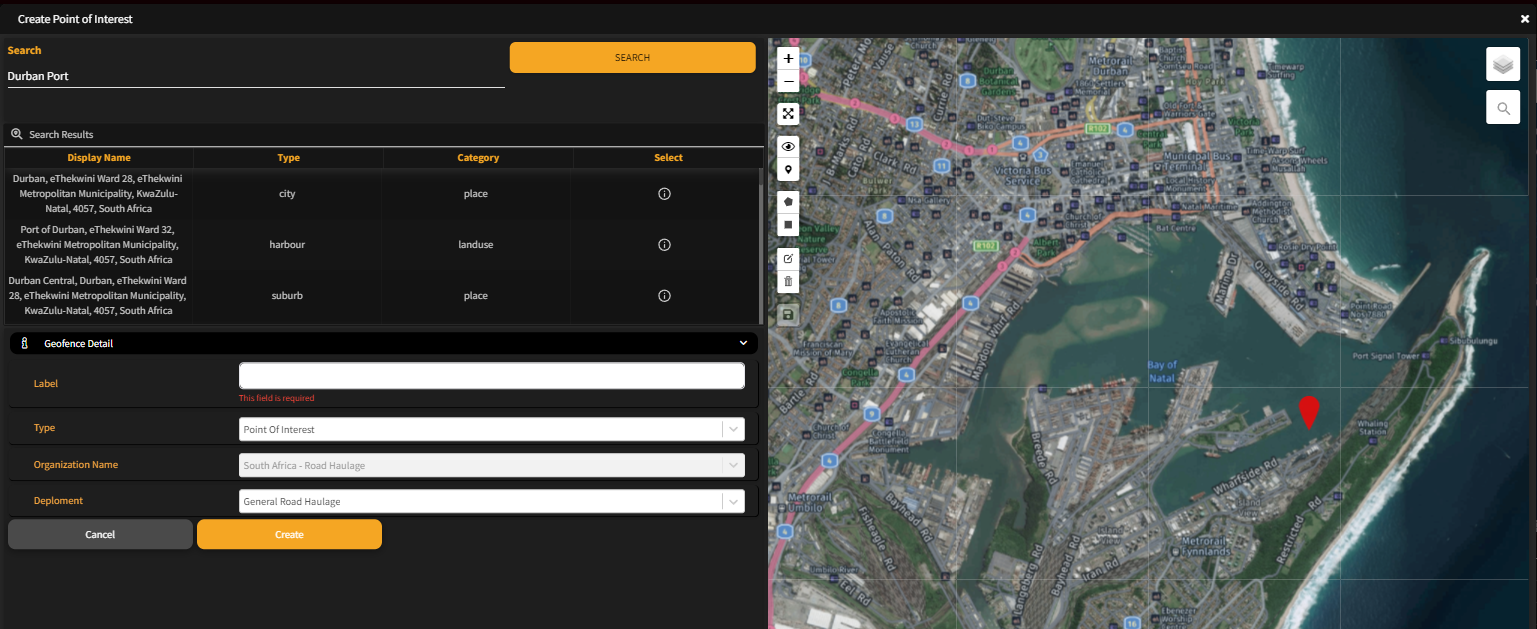
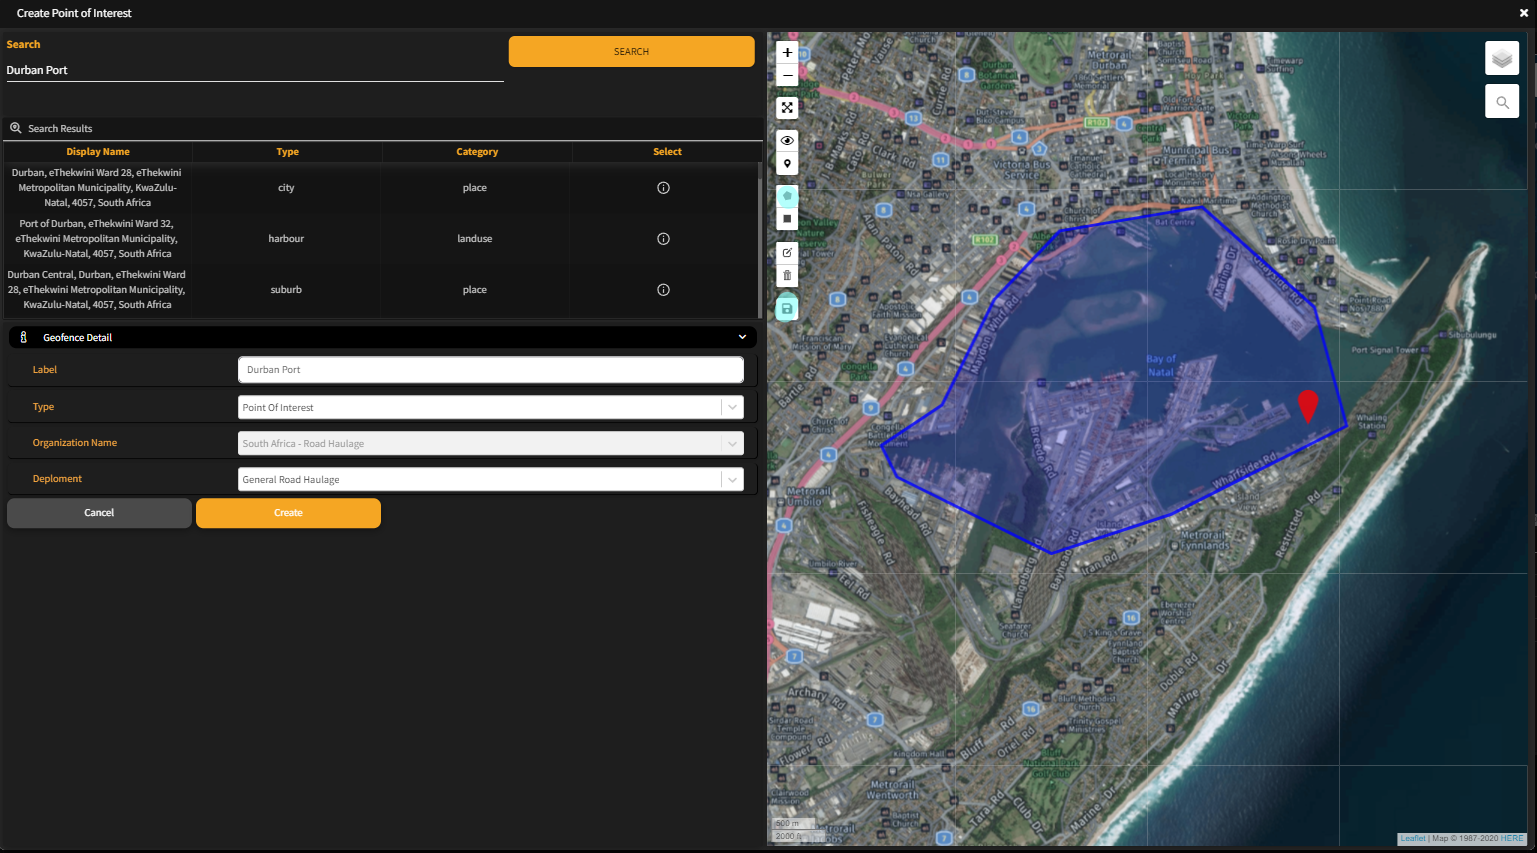
In order to draw a geofence, click on the Create Geofence icon (highlighted blue), you can now plot out an area on the map to your liking by left clicking on multiple areas on the map you would like to geofence. With each click, the points on the map you clicked, will in order connect the last click to the previous, complete the creating of the geofence by connecting your last point to the first and click on the Save icon (highlighted in blue)
Give this geofence a sensible name and select what type of geofence it is as per the example below.
Click on the Create button in order to complete the process.
At this point you will find yourself back on the Create Schedule Main Page window, and the newly created geofence should now be in the Geofence drop down list. Select it and confirm that the other settings are correct. Once you are satisfied that all the information is correct, click the Create button, this will take you back to the Asset Schedule window and you should now be presented with an entry to this table matching the Schedule created.
